Creating an email account in cPanel is a simple process that allows you to have a custom email address with your domain name. This guide will walk you through the steps to create a new email account in cPanel.
Step 1: Log in to cPanel
Learn how to log in to cPanel.
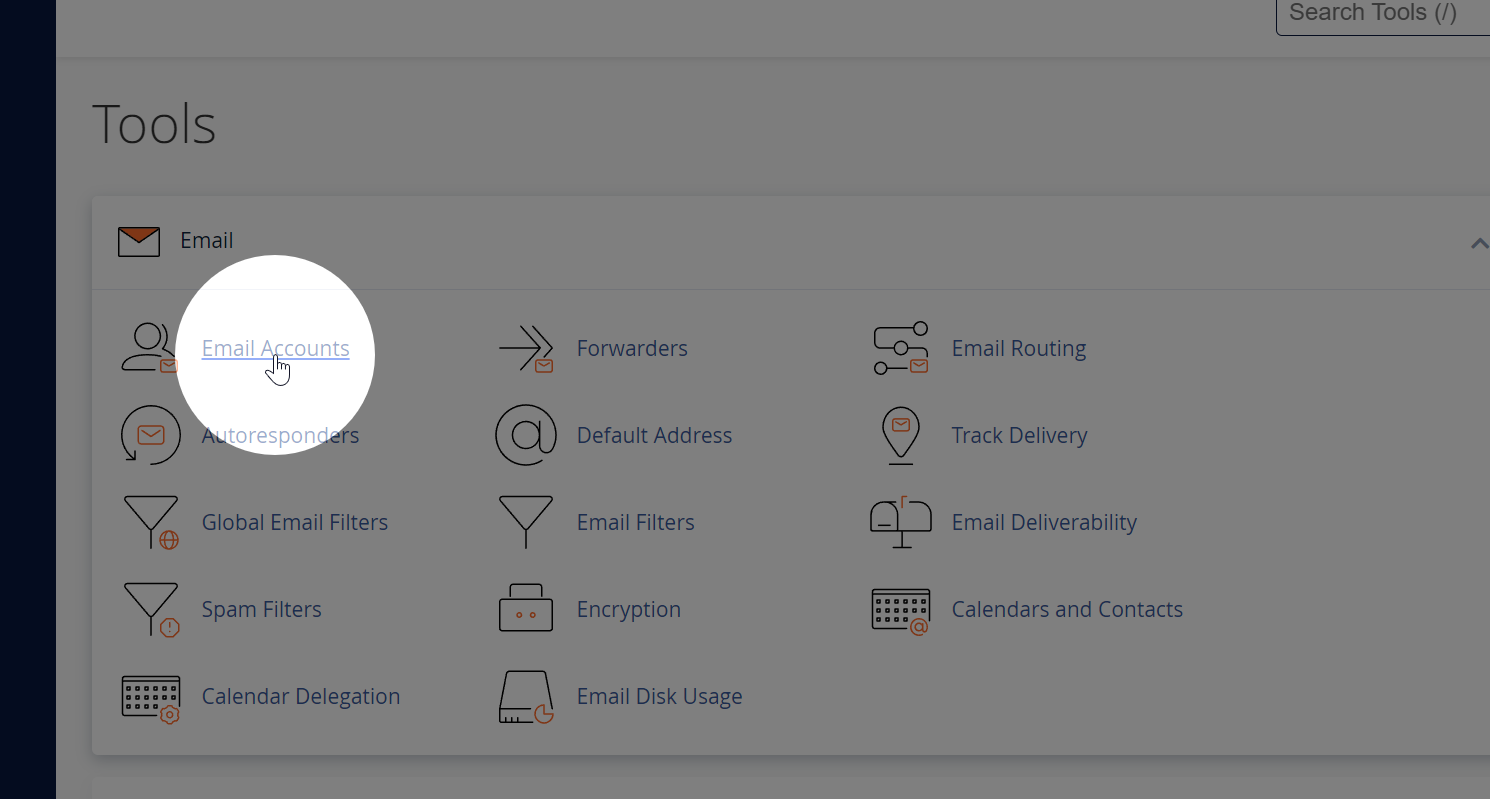
Step 2: Navigate to the Email Accounts Section
Once logged in to cPanel, locate the "Email" section and click on the "Email Accounts" icon. This will open the Email Accounts management page.
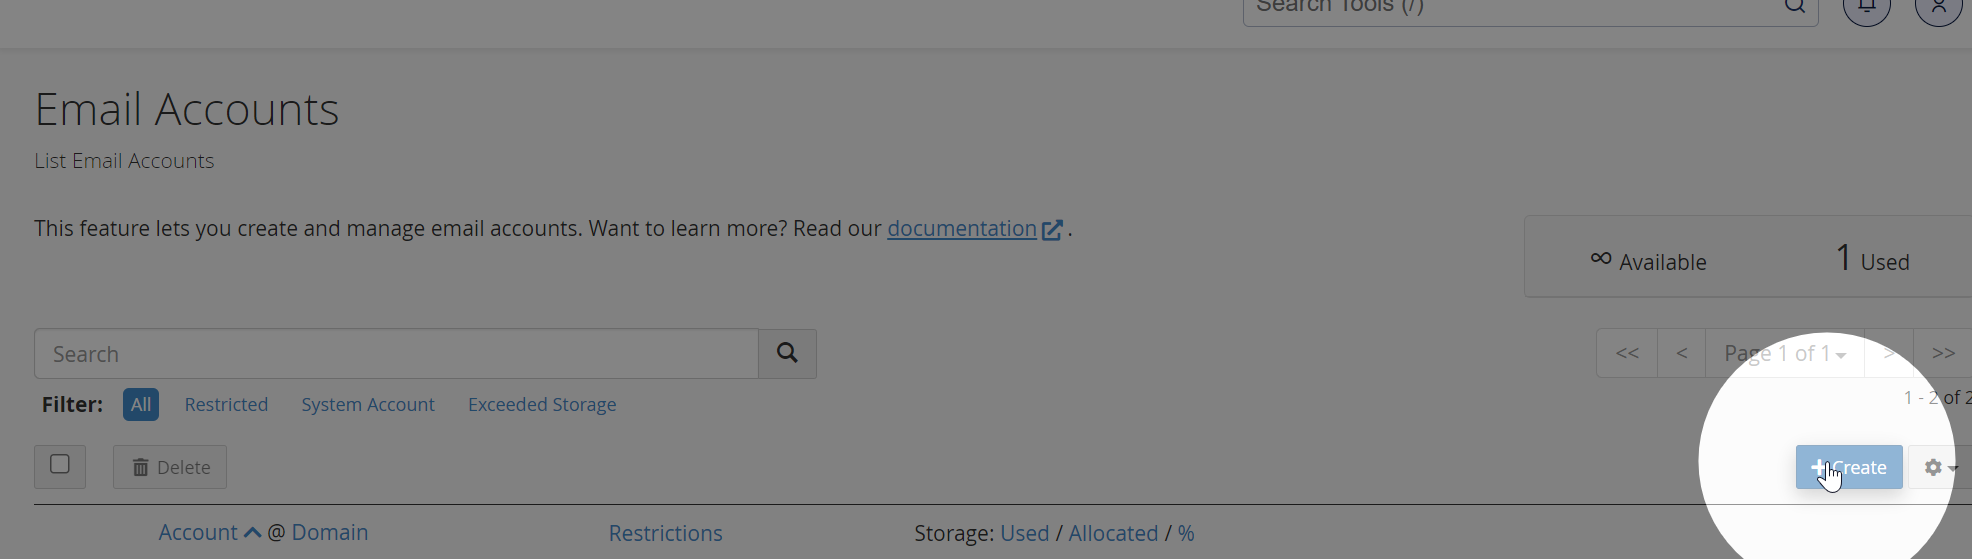
Step 3: Create a New Email Account
On the Email Accounts page, click on the "Create" or "Add Email Account" button. This will open the email account creation form.
Step 4: Fill in the Email Account Details Fill in the required information for your new email account:
- Email Domain: Select the email domain from the dropdown. Learn how to add a domain to your cPanel account.
- Email Username: Enter the desired username for your email account (e.g., yourname).
- Password: Create a strong password for your new email account. You can use the "Generate" button to create a secure, random password. Be sure to note the password for future reference.
- Storage Space: Specify the storage space quota for the email account. You can choose between a fixed quota (e.g., 1024 MB) or unlimited storage, depending on your hosting plan and available resources.
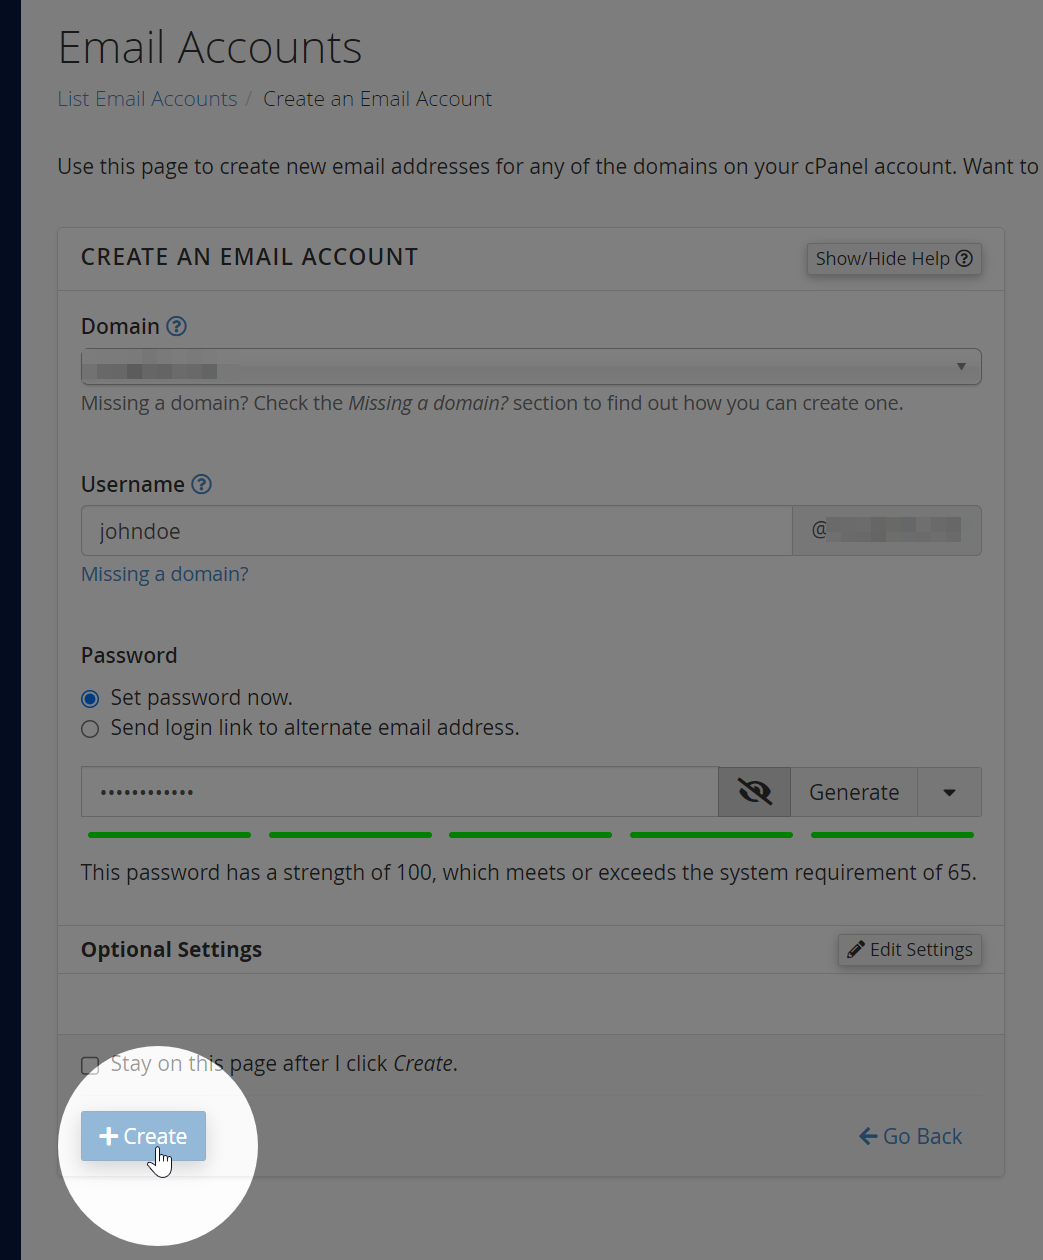
Step 5: Create the Email Account
Once you've filled in all the required information, click the "Create" button at the bottom of the form. Your new email account will be created, and you'll see a confirmation message.
Step 6: Access Your New Email Account